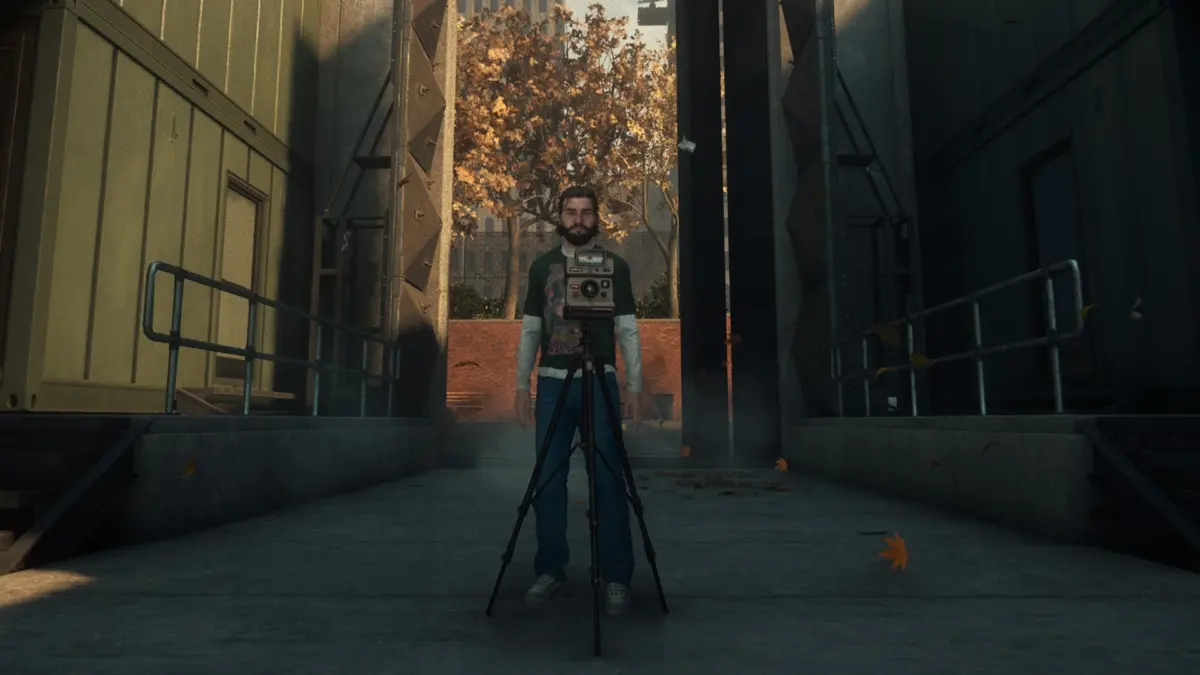
The expansive world of Control Resonant presents players with a multitude of challenging side objectives, chief among them being the perplexing "Freeze Frame" quest. This intricate assignment tasks players with hunting down a series of anomalous, hostile cameras scattered throughout the game’s various zones. True to their name, these devices possess the supernatural ability to instantly freeze the player in place the moment their lenses capture a clear picture. To successfully neutralize these objects and safeguard vulnerable civilians trapped in their paths of view, players must carefully study their surroundings, avoid direct lines of sight, and approach the cameras from behind to manually shut their mechanical lids.

While the game provides instant photographs as rudimentary hints to guide the search, these visual clues offer only partial context, leaving players to navigate complex urban landscapes and hazardous environments. Furthermore, successfully tracking down these devices requires careful preparation. Before embarking on the statewide hunt, players are strongly advised to secure specific traversal abilities, namely Shift and Reach, which are essential for accessing the elevated platforms, sideways buildings, and otherwise unreachable sectors where the cameras are concealed. With these tools in hand, players can begin systematically neutralizing the surveillance anomalies across Downtown, the Central district, the West Incursion Zone, the Evacuation Zone, The Park, the Underpass, and the Unknown zone.
Downtown ‘Freeze Frame’ Camera Locations
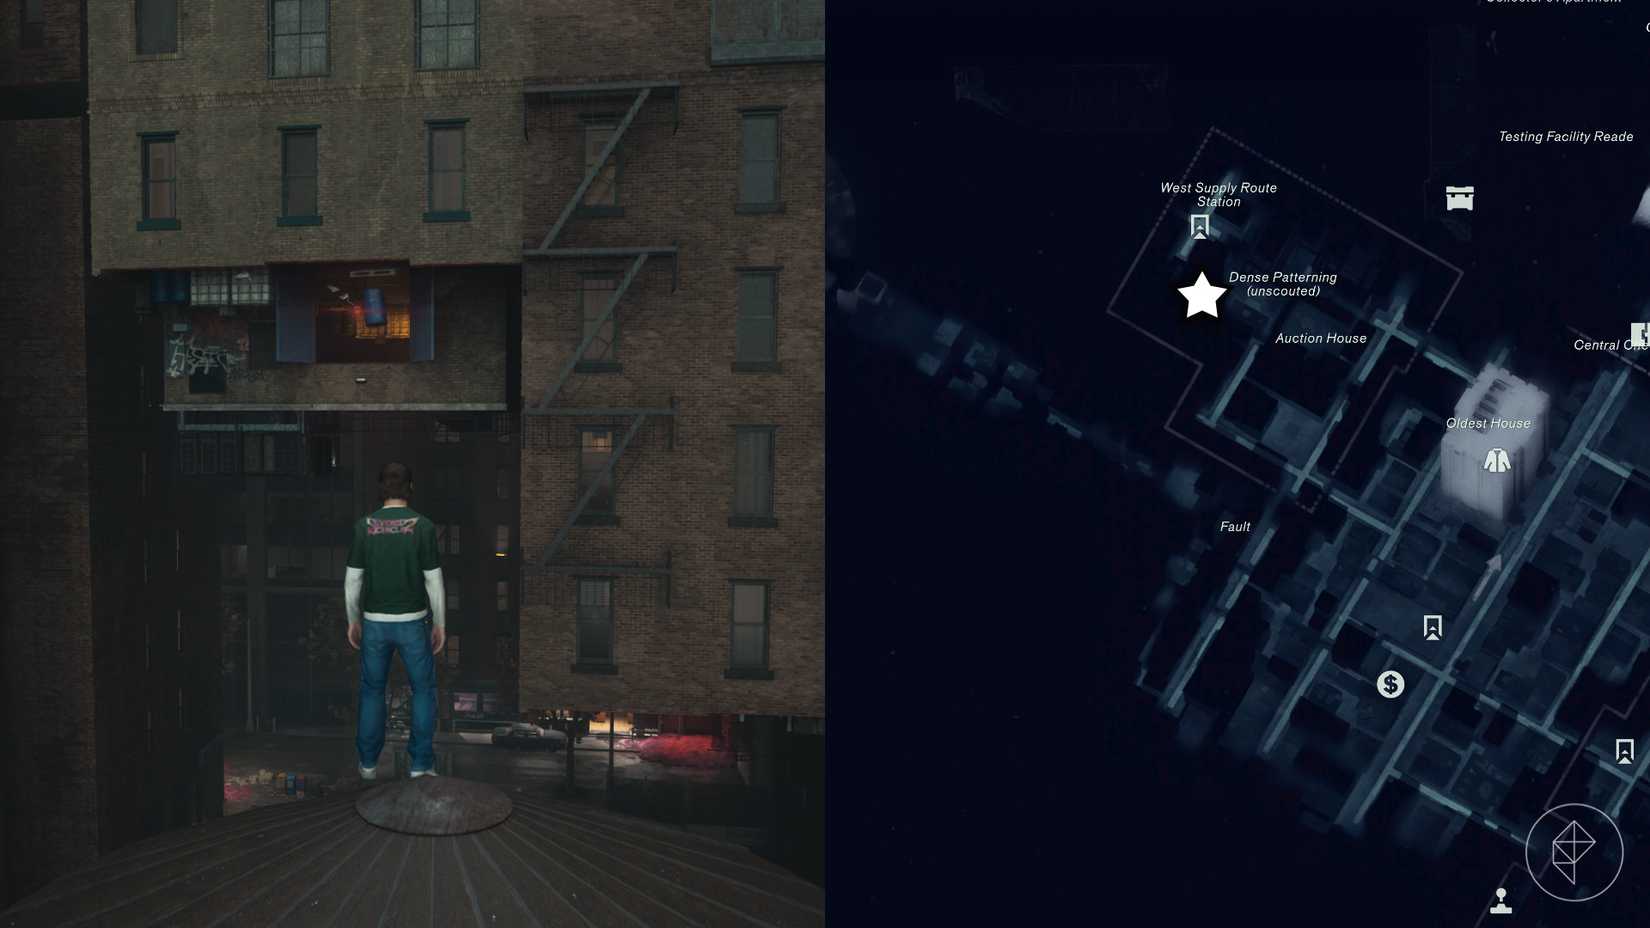
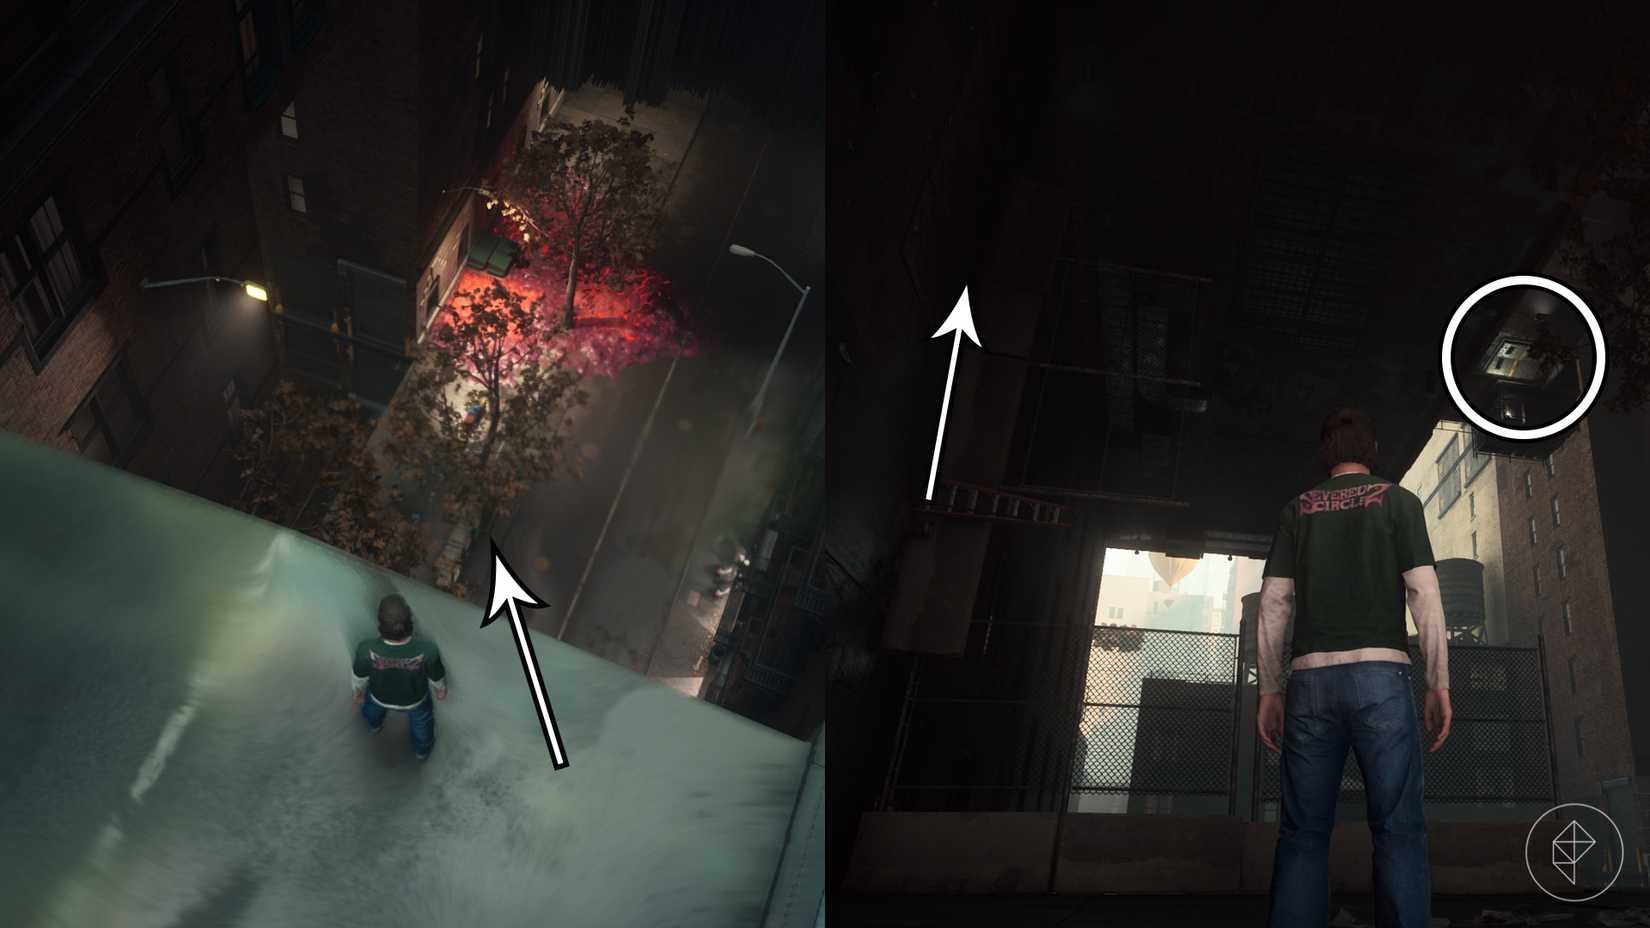
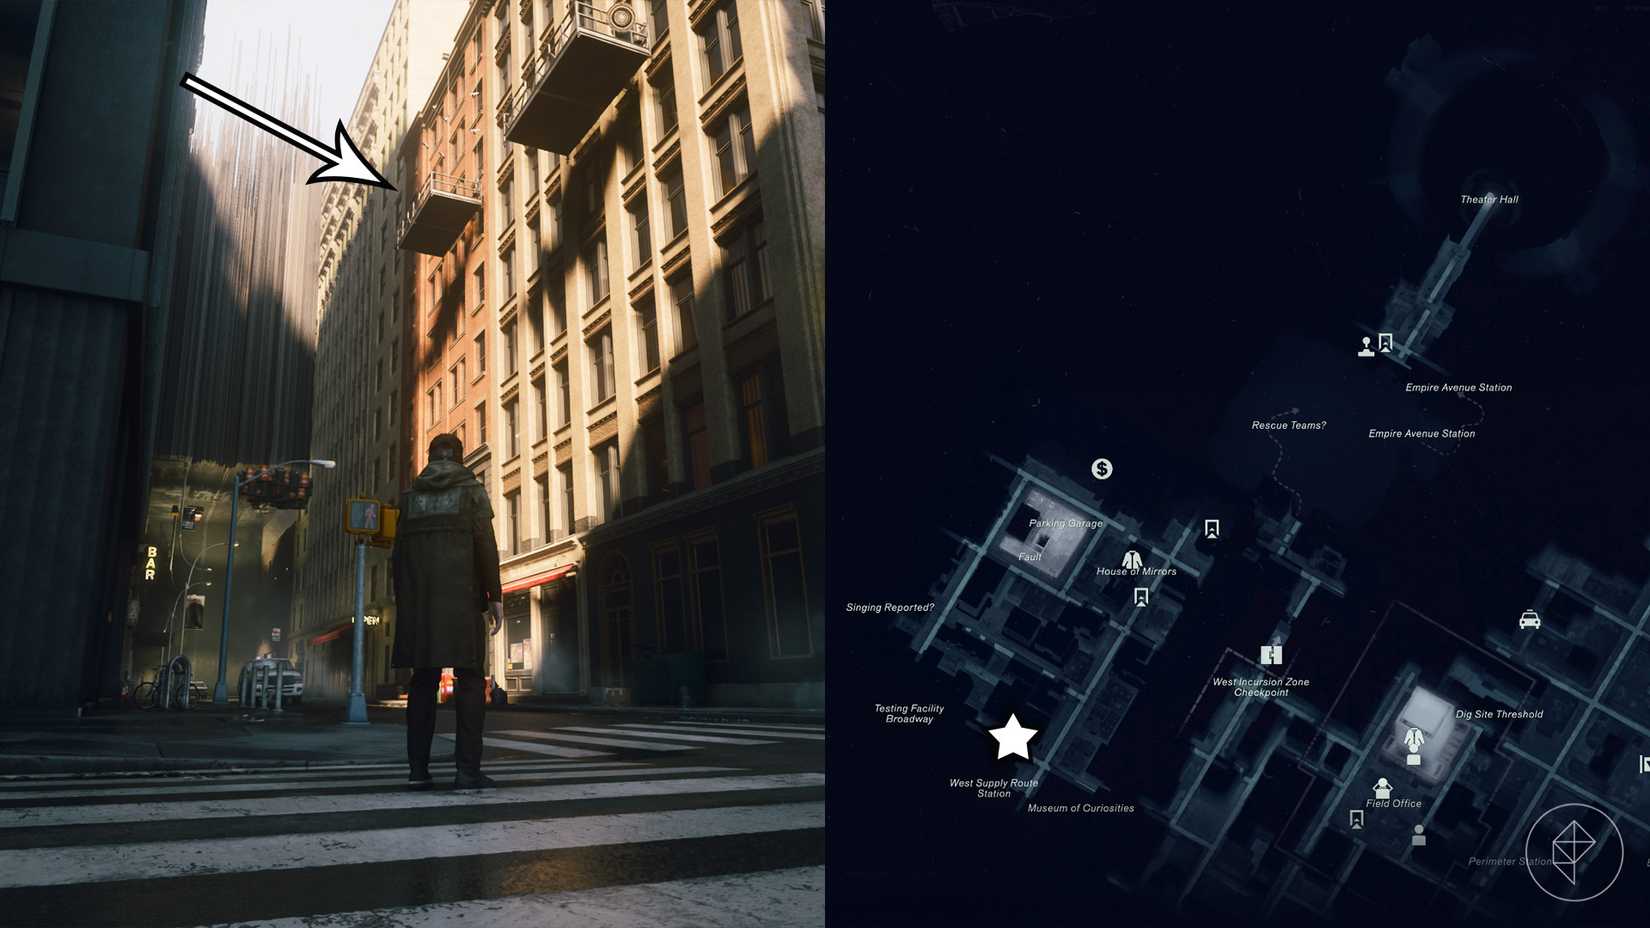
The Downtown region contains two distinct cameras, each demanding specific traversal mechanics to reach. The first is located in the northwestern portion of Downtown, positioned just east of the Dense Patterning area and south of the West Supply Route Station. Reaching this location requires the Shift ability, which is acquired from the Incursion Fault located within the West Incursion Zone. Players can efficiently navigate to the site by following the roadway southwest from the West Supply Route Station until they drop onto a lower street level. From this vantage point, an upside-down building appears to the east, featuring a locked metal door positioned near its base. By utilizing the Shift ability to scale the vertical wall to the left and dropping onto the rooftop, players can then use the Crush ability to force the metal door open and shut the camera’s lid to deactivate it.
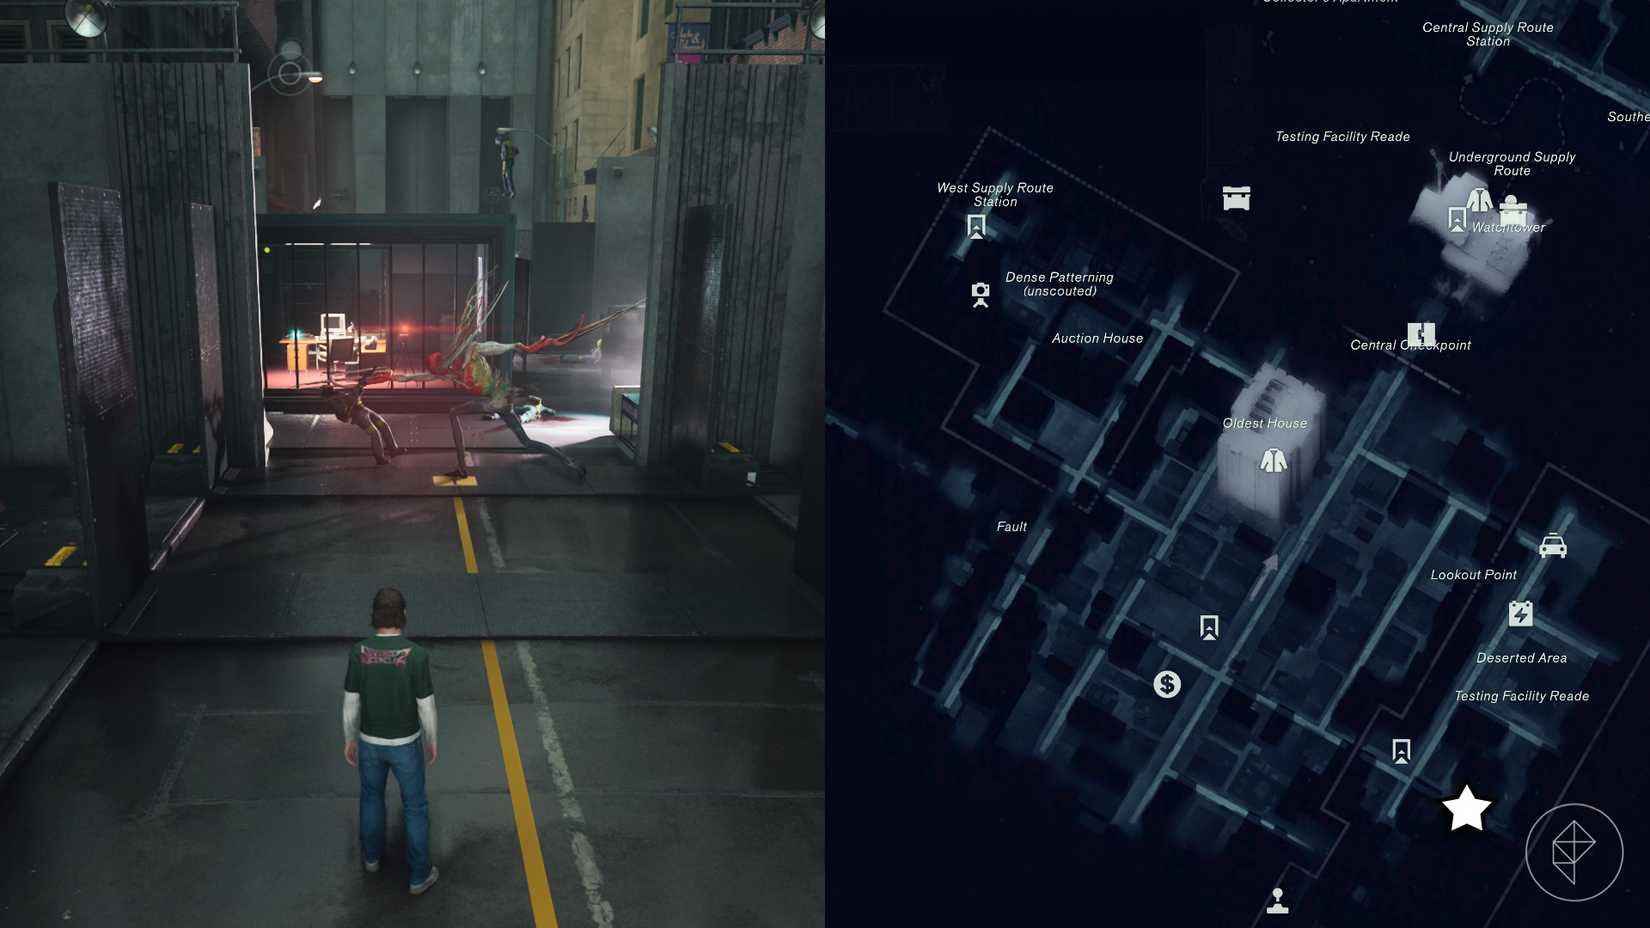
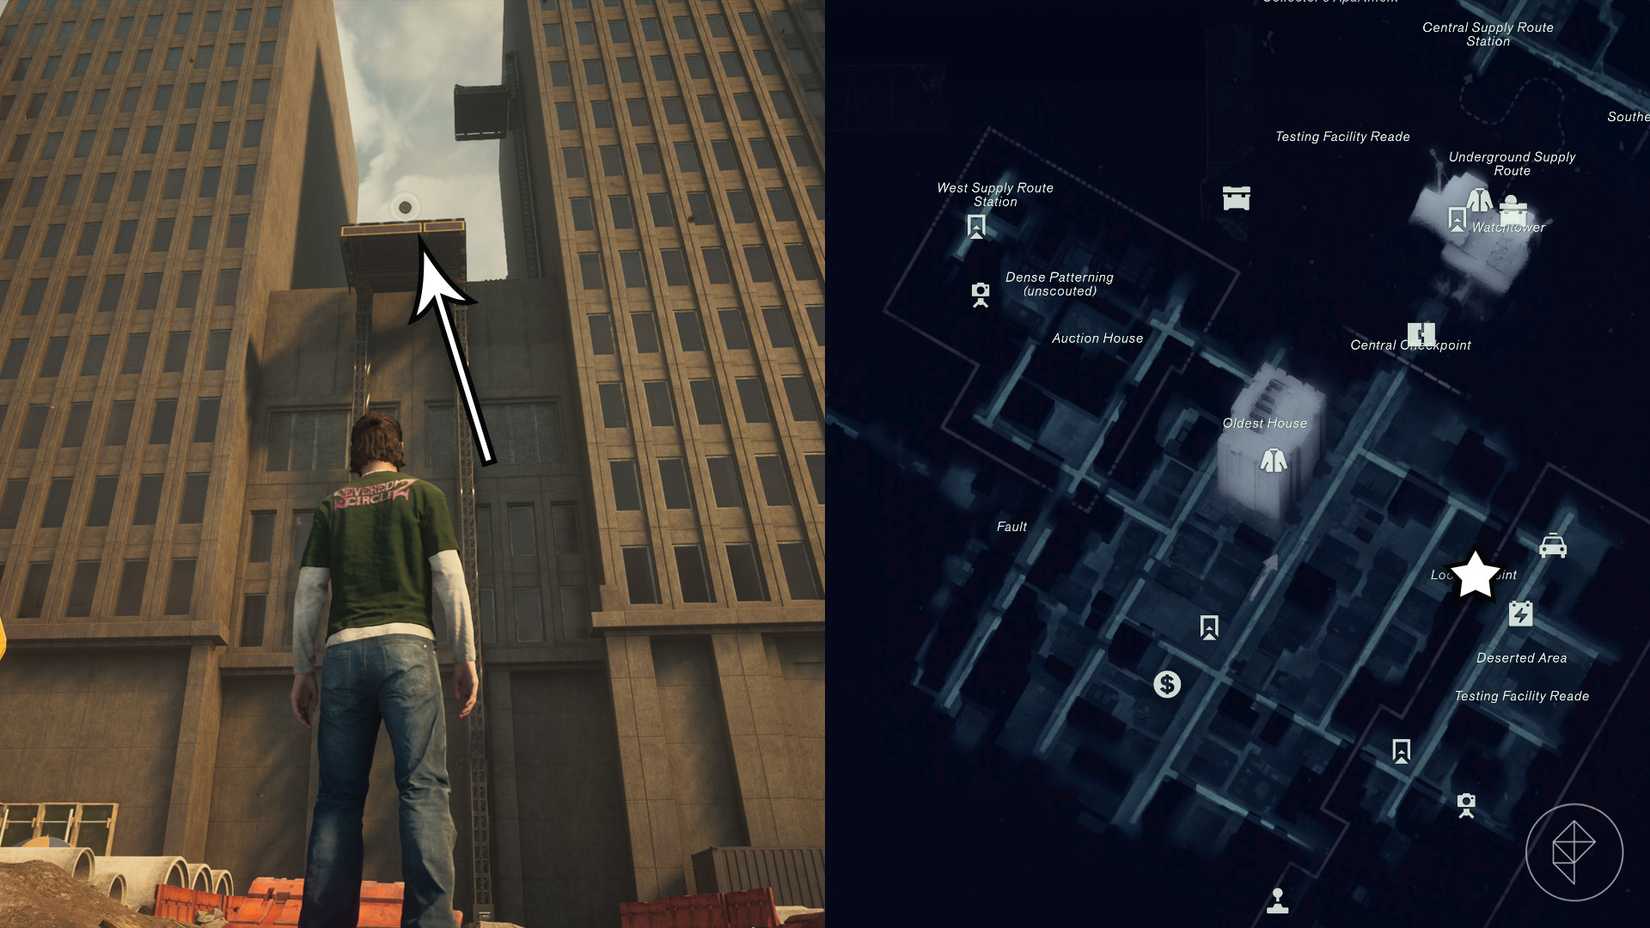
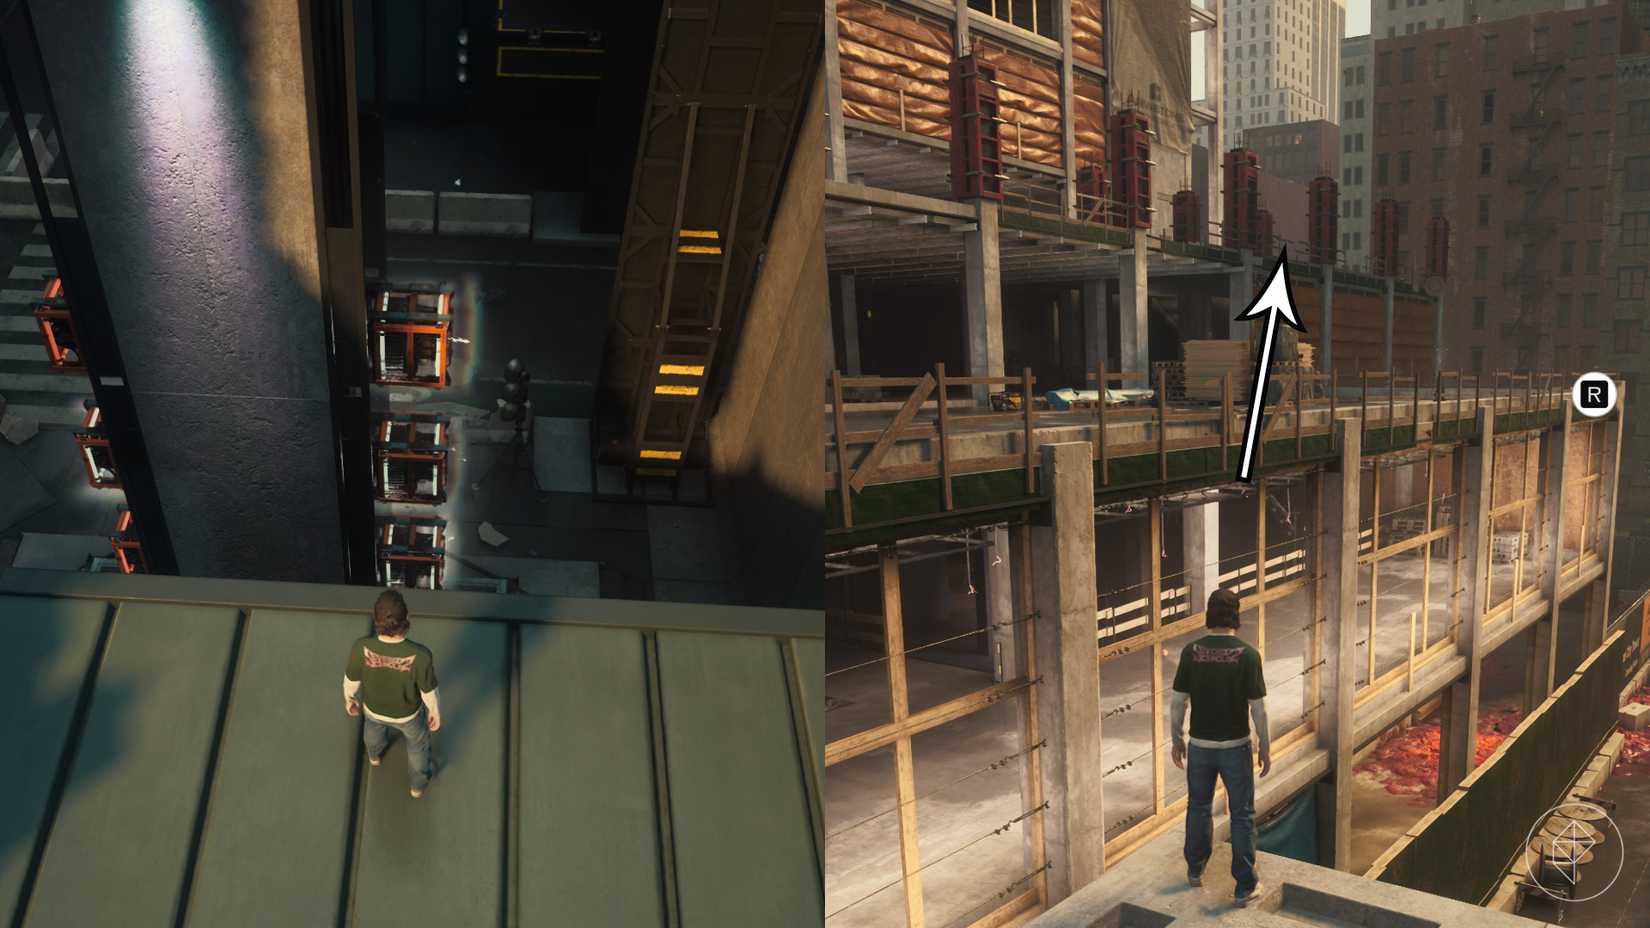
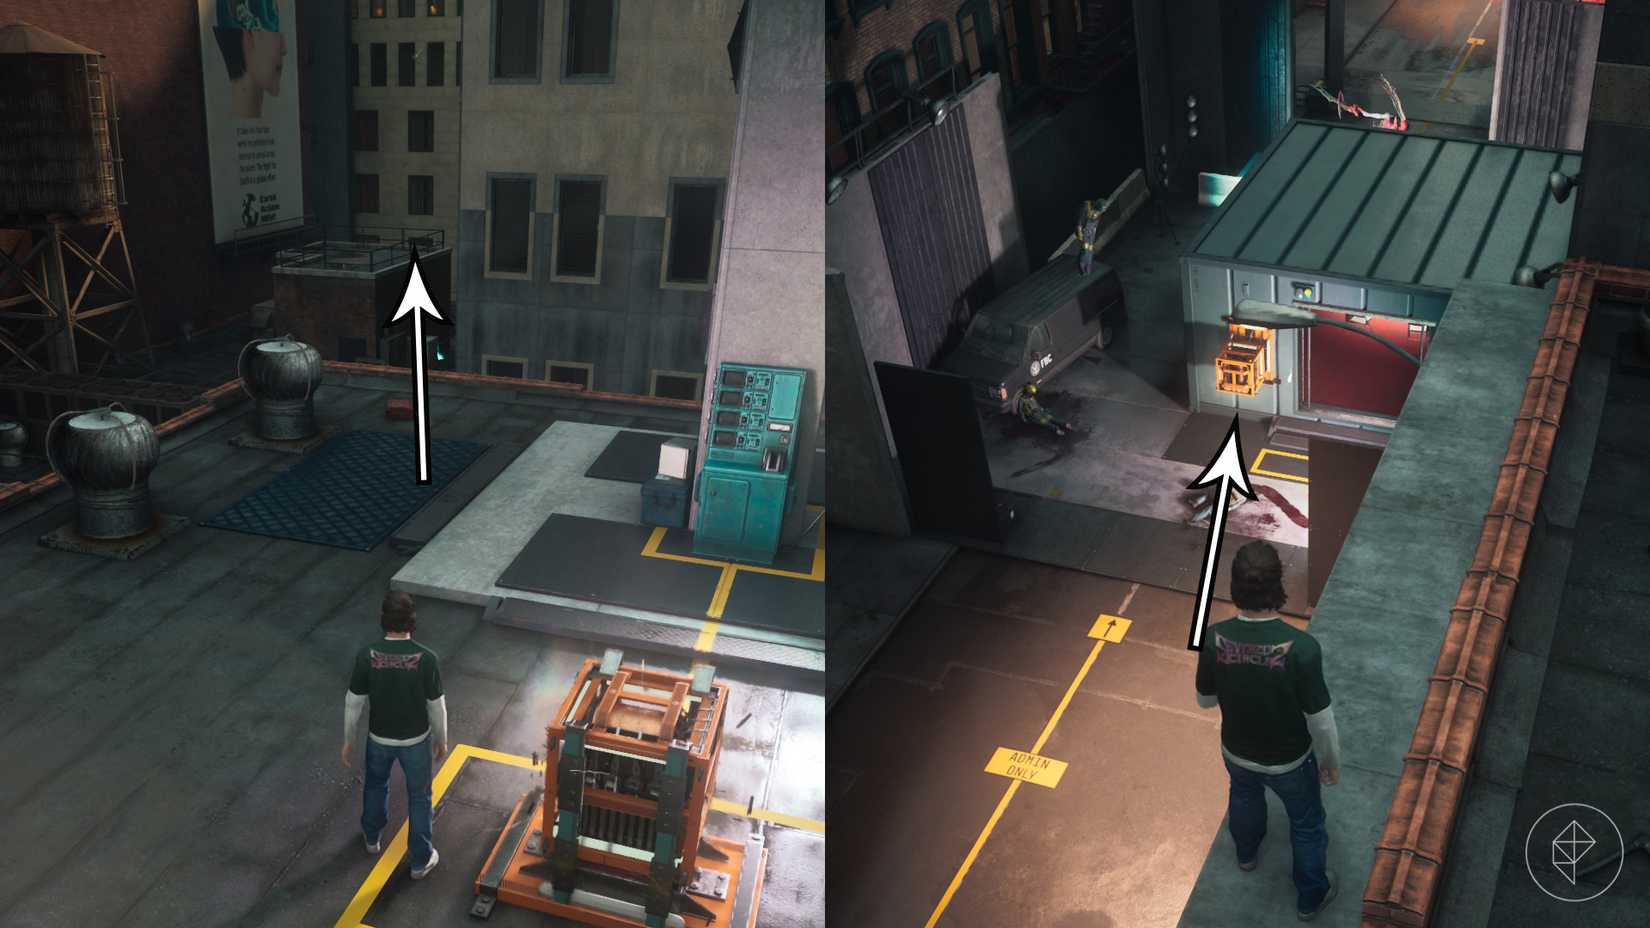
The second Downtown camera is situated in the southeast corner of the eastern region, an area accessible only by obtaining the Reach ability from the Subway Fault located inside the Evacuation Zone. Players must first travel to Lookout Point and employ Reach on an elevated metal platform. Positioned just below this platform are several power cores. Although players will need one of these cores to unlock the door situated behind the camera, navigating the route successfully is heavily streamlined by first acquiring the "Extended Rush" talent and practicing the pathing. By jumping onto the green storage container building adjacent to the power cores, hitting one to activate it, and swiftly crossing over to the adjacent construction site, players can continue southward to a building featuring an uncharged power core on its roof. Striking this core transfers the charge, allowing players to subsequently target another uncharged core on the street below from a nearby rooftop, ultimately unlocking the chamber housing the camera.
Central ‘Freeze Frame’ Camera Locations
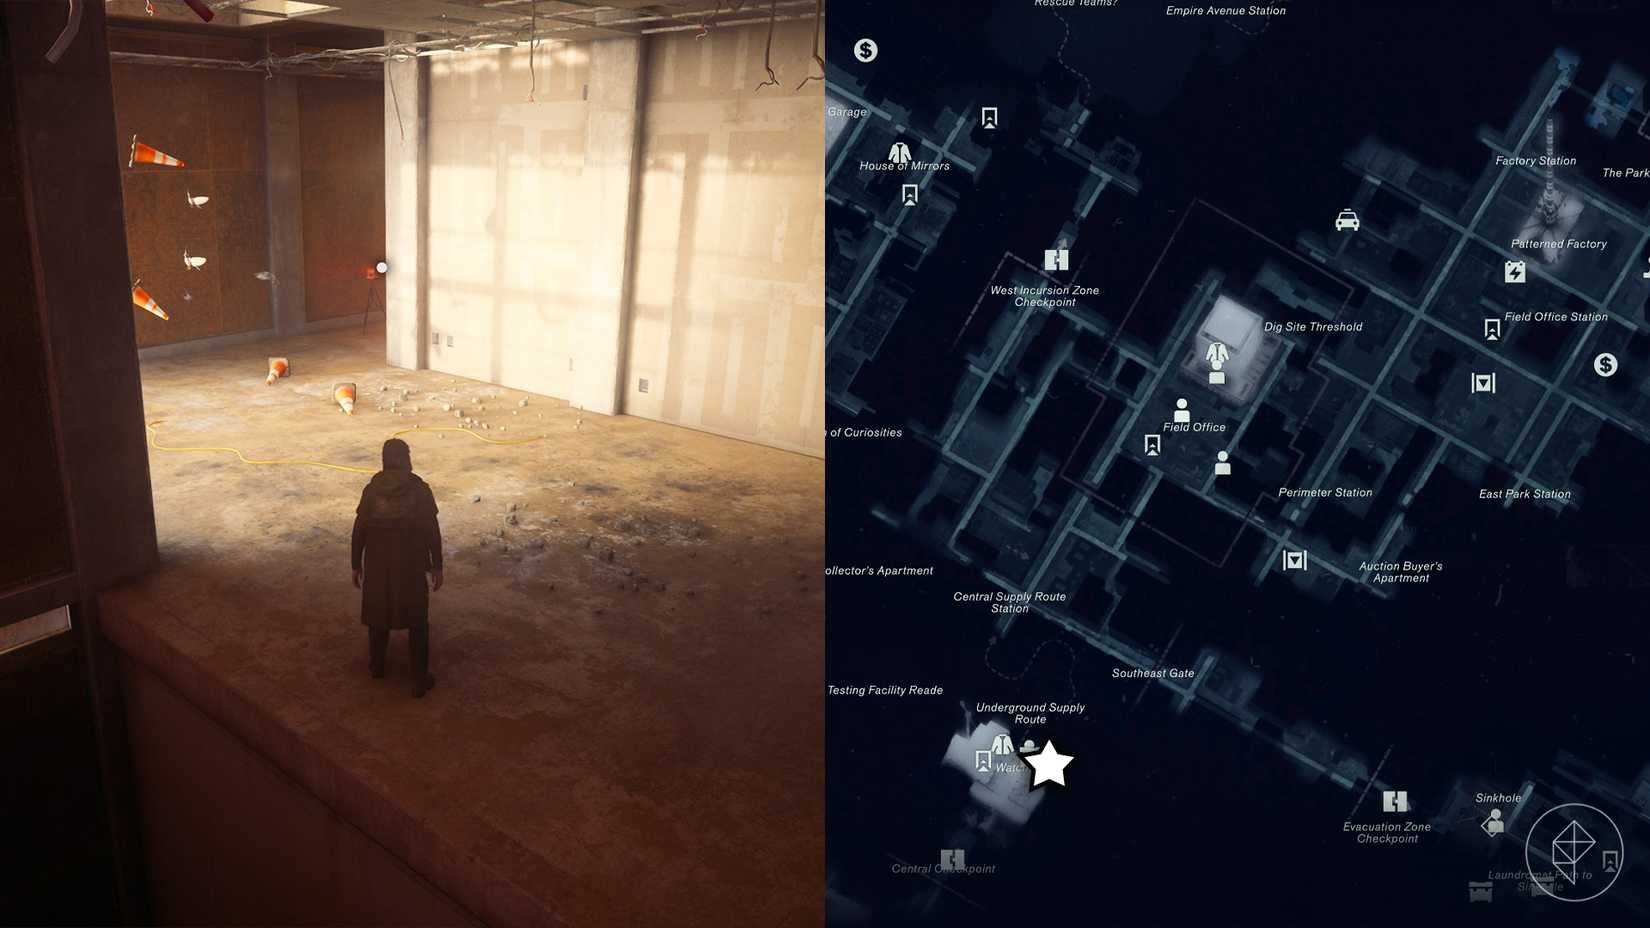
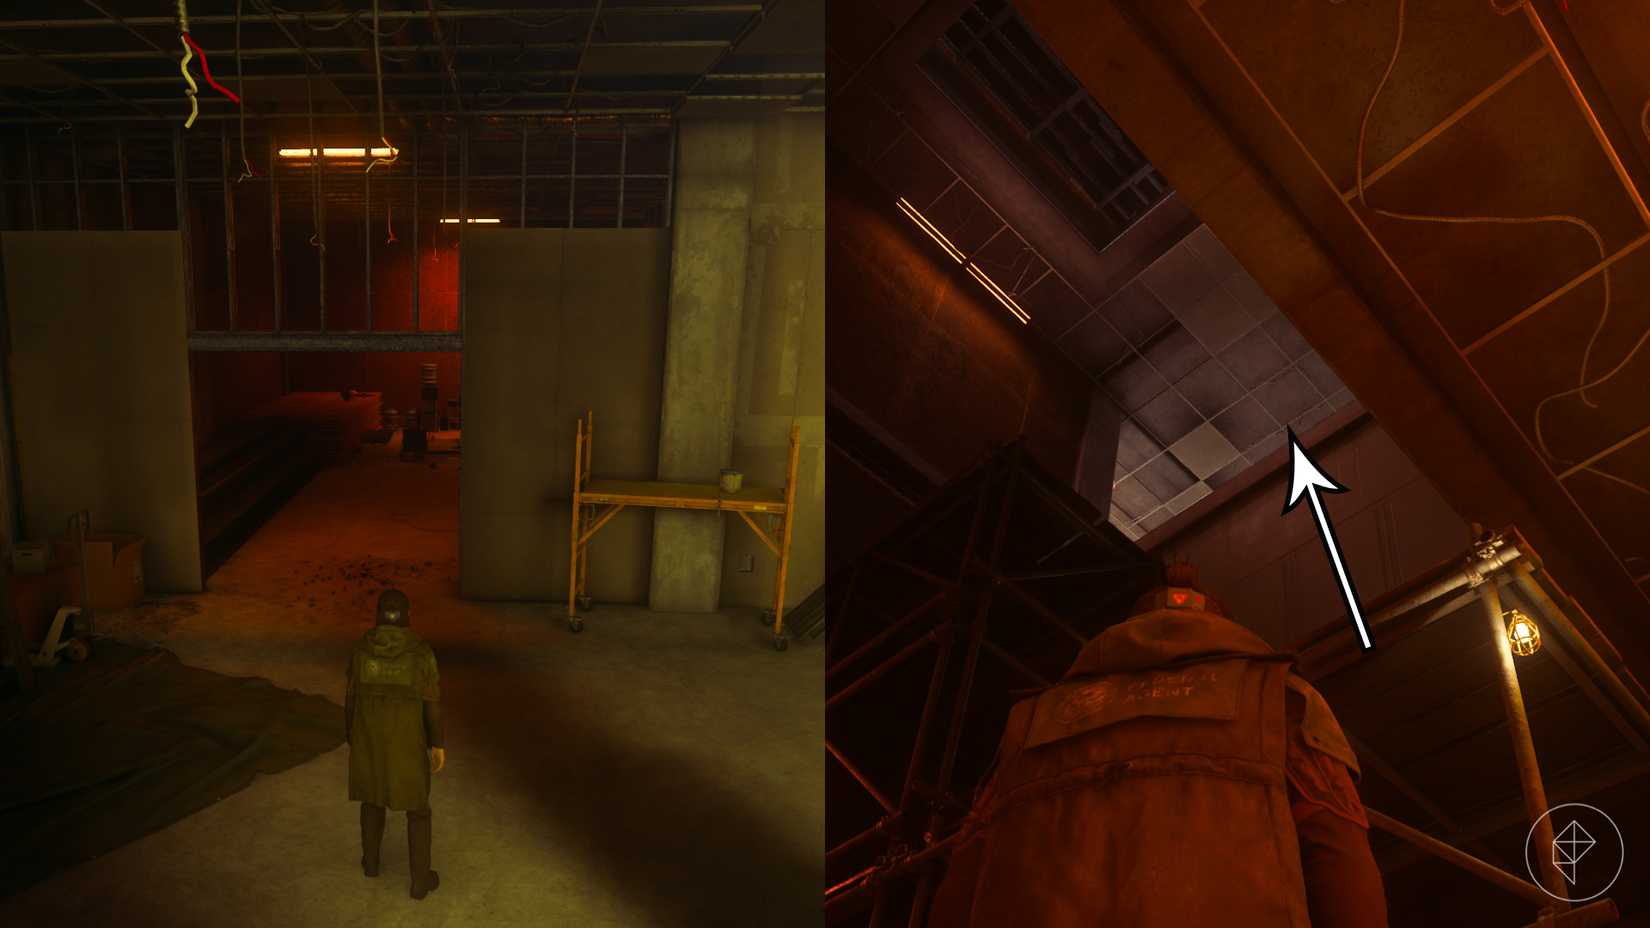
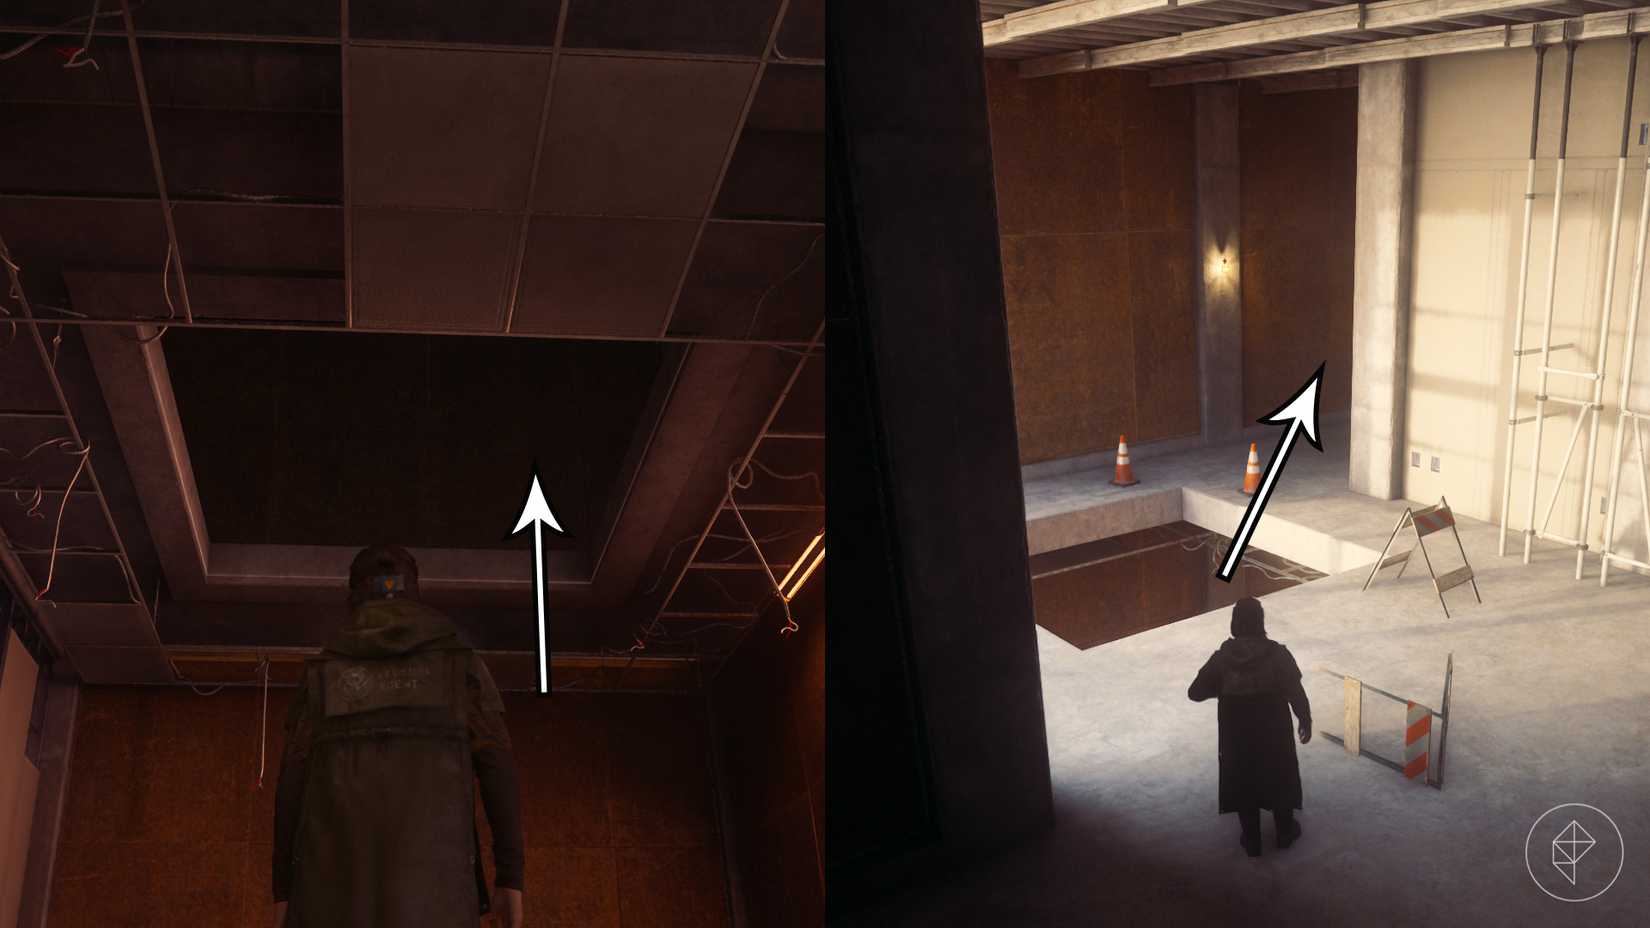
In the Central district, the initial camera offers players their earliest opportunity to encounter the surveillance anomaly. Located within the Watchtower, players must descend to the lowest floor, situated just beneath the elevator, and enter the distinct orange-red illuminated room. By climbing the scaffolding in the eastern corner, players can spot the camera from a distance, though approaching the upper hallway prematurely will trigger its capture mechanism. To bypass this, players must instead leap into a hole in the ceiling and subsequently drop through a secondary opening in the floor, which successfully places them directly behind the camera for a safe deactivation.
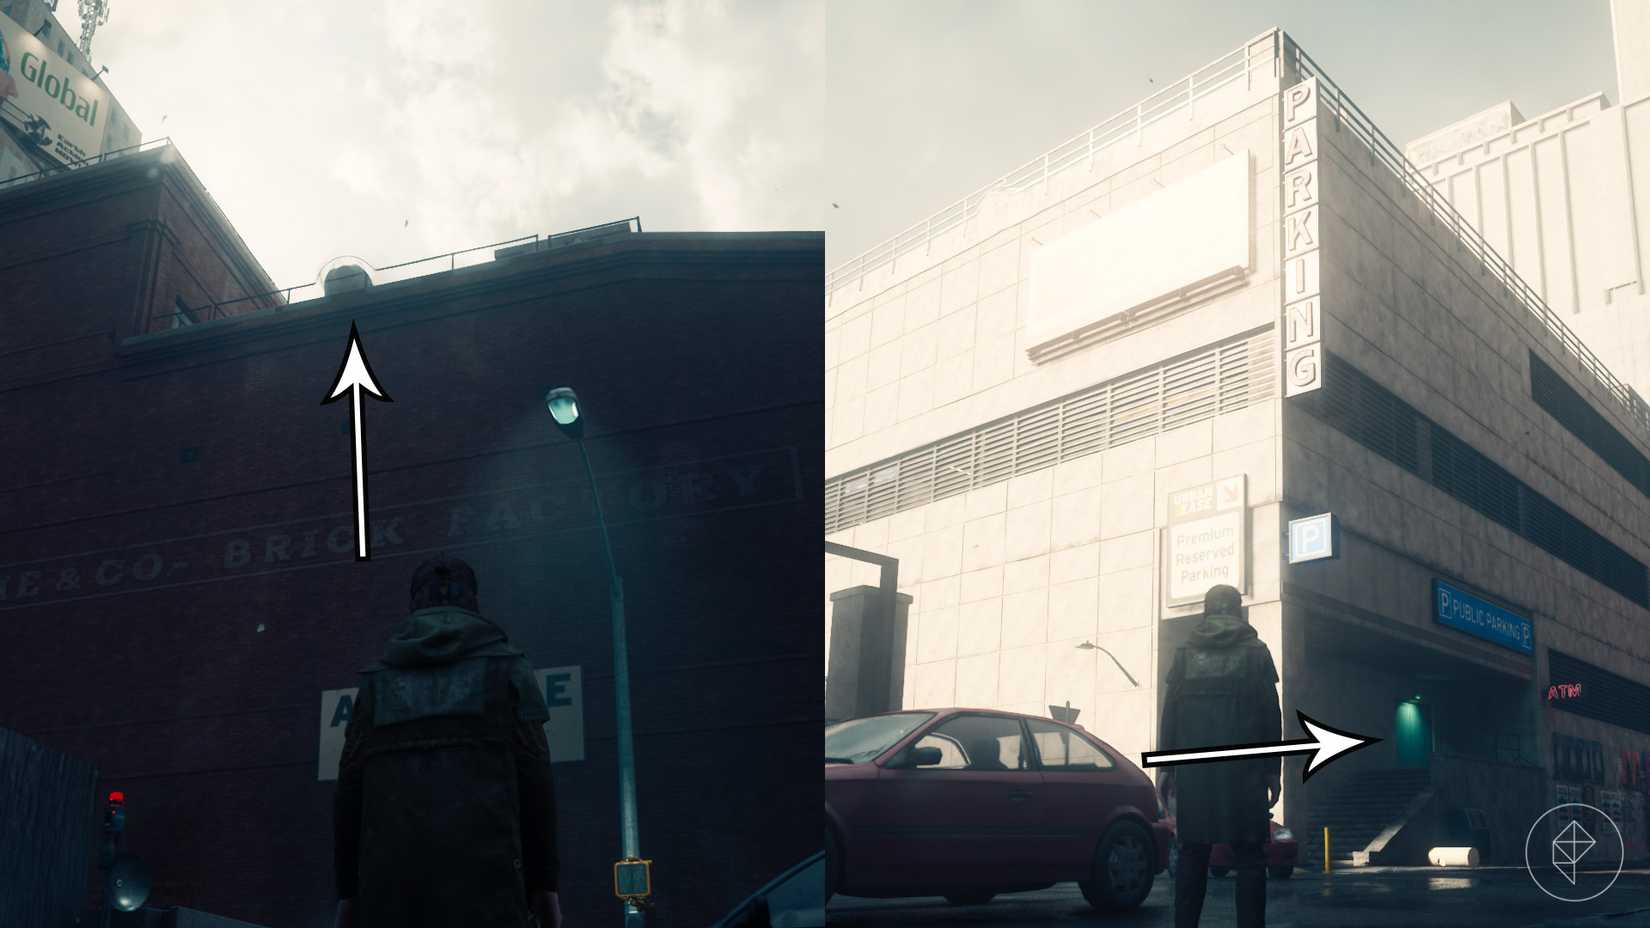
The second Central camera is positioned on the top floor of a brick factory located northeast of the parking garage. Players can reach this destination either by scaling the area with the Reach ability or by jumping across from the roof of the parking garage. While Reach offers a faster and safer route that bypasses a heavy concentration of hostile entities within the garage, the alternative rooftop route remains viable for those lacking the traversal power. For this particular camera, players must intentionally position themselves within its field of view to trigger its flash, after which the device temporarily disappears. Entering the building and descending to the bottom floor allows players to clear out remaining enemies and open the red exterior door. Stepping outside causes the camera to respawn, enabling players to retrace their steps back to the top floor and shut down the device from behind.
West Incursion Zone ‘Freeze Frame’ Camera Locations
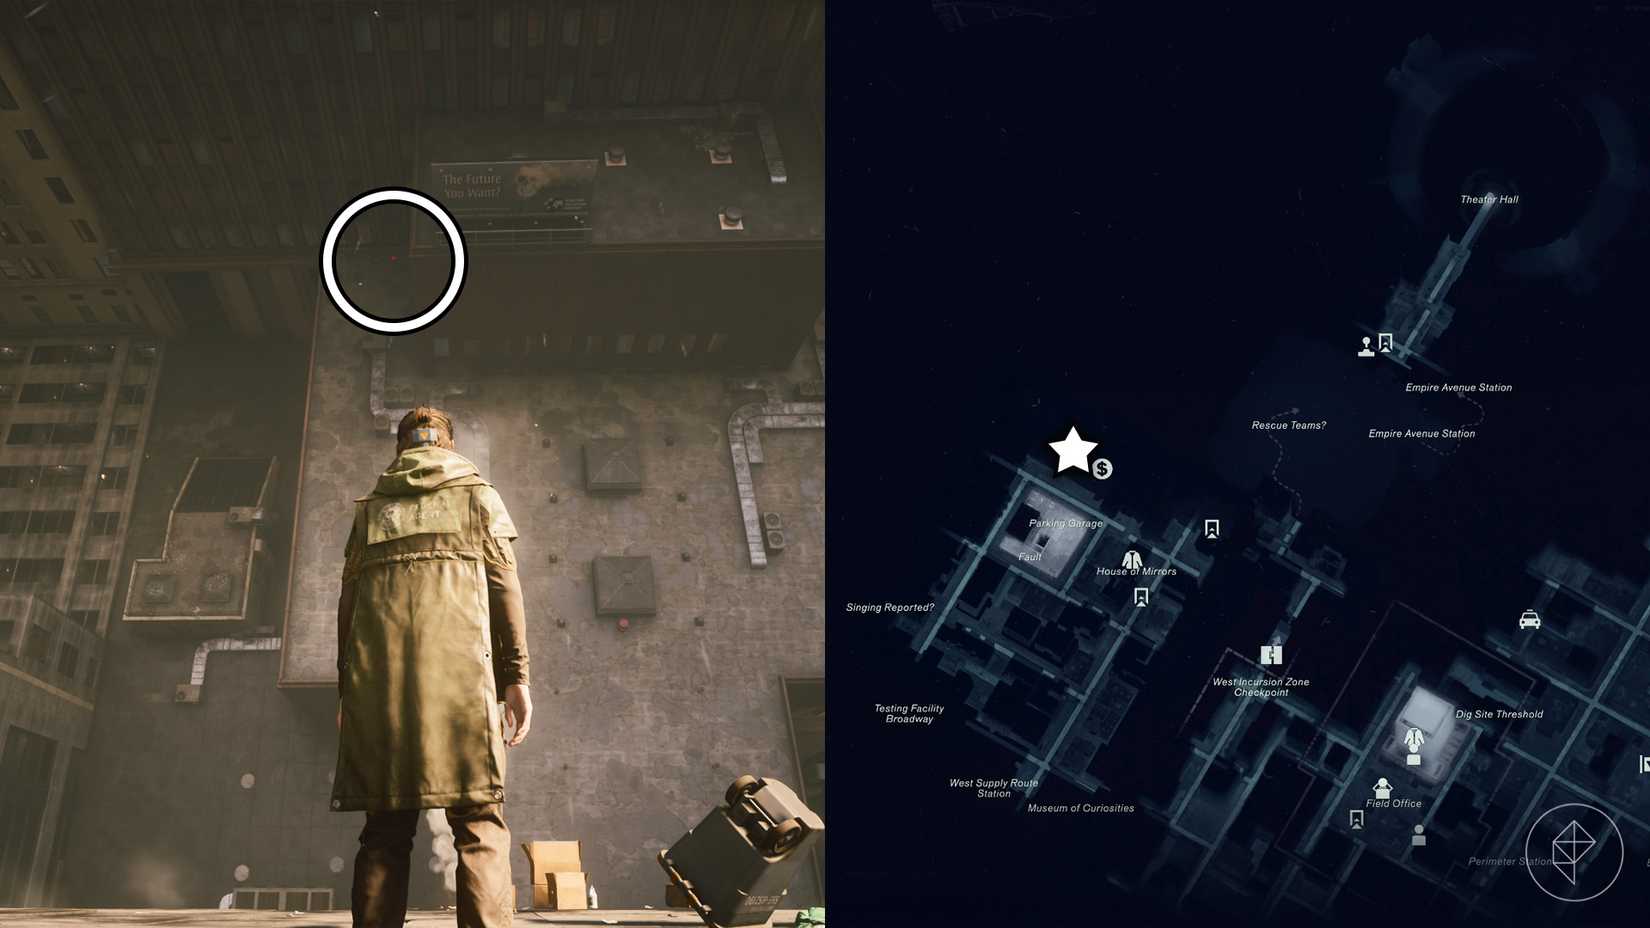
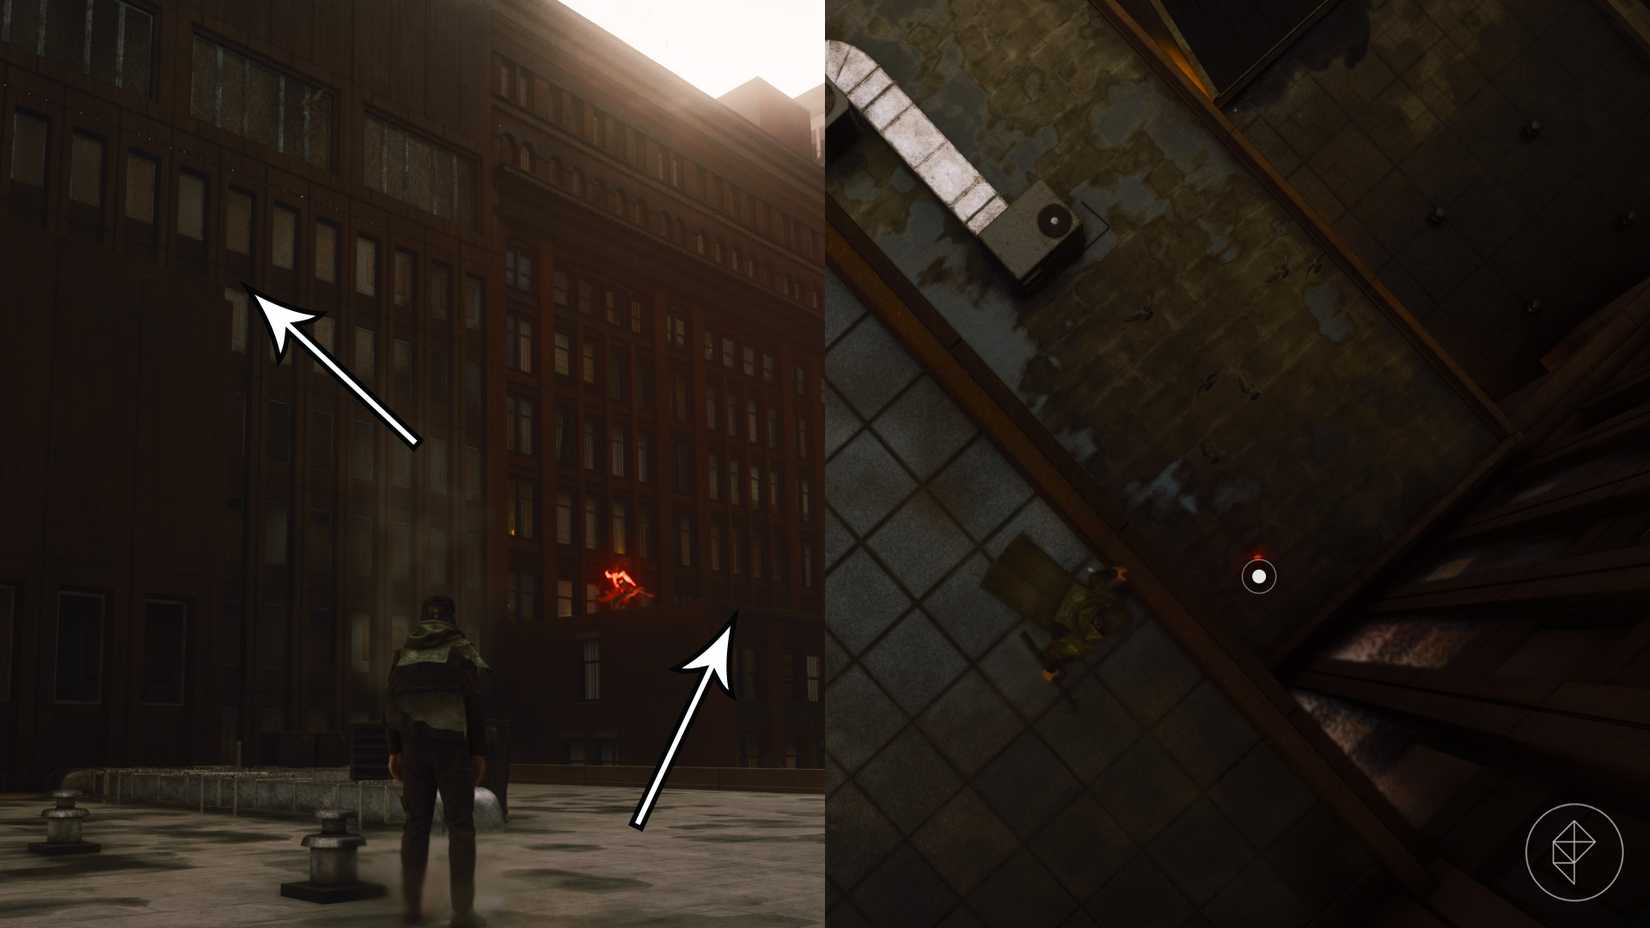
Navigating the West Incursion Zone requires the prior acquisition of the Shift ability, which is earned by completing the Incursion Fault situated inside the parking garage. The first camera in this zone is found immediately northeast of the parking garage, resting upon the roof of a sideways building marked by a faint red indicator light. By utilizing Shift to access the structure without stepping into the camera’s direct path, players can traverse to an adjacent higher rooftop, drop down behind the device, and close its lid.
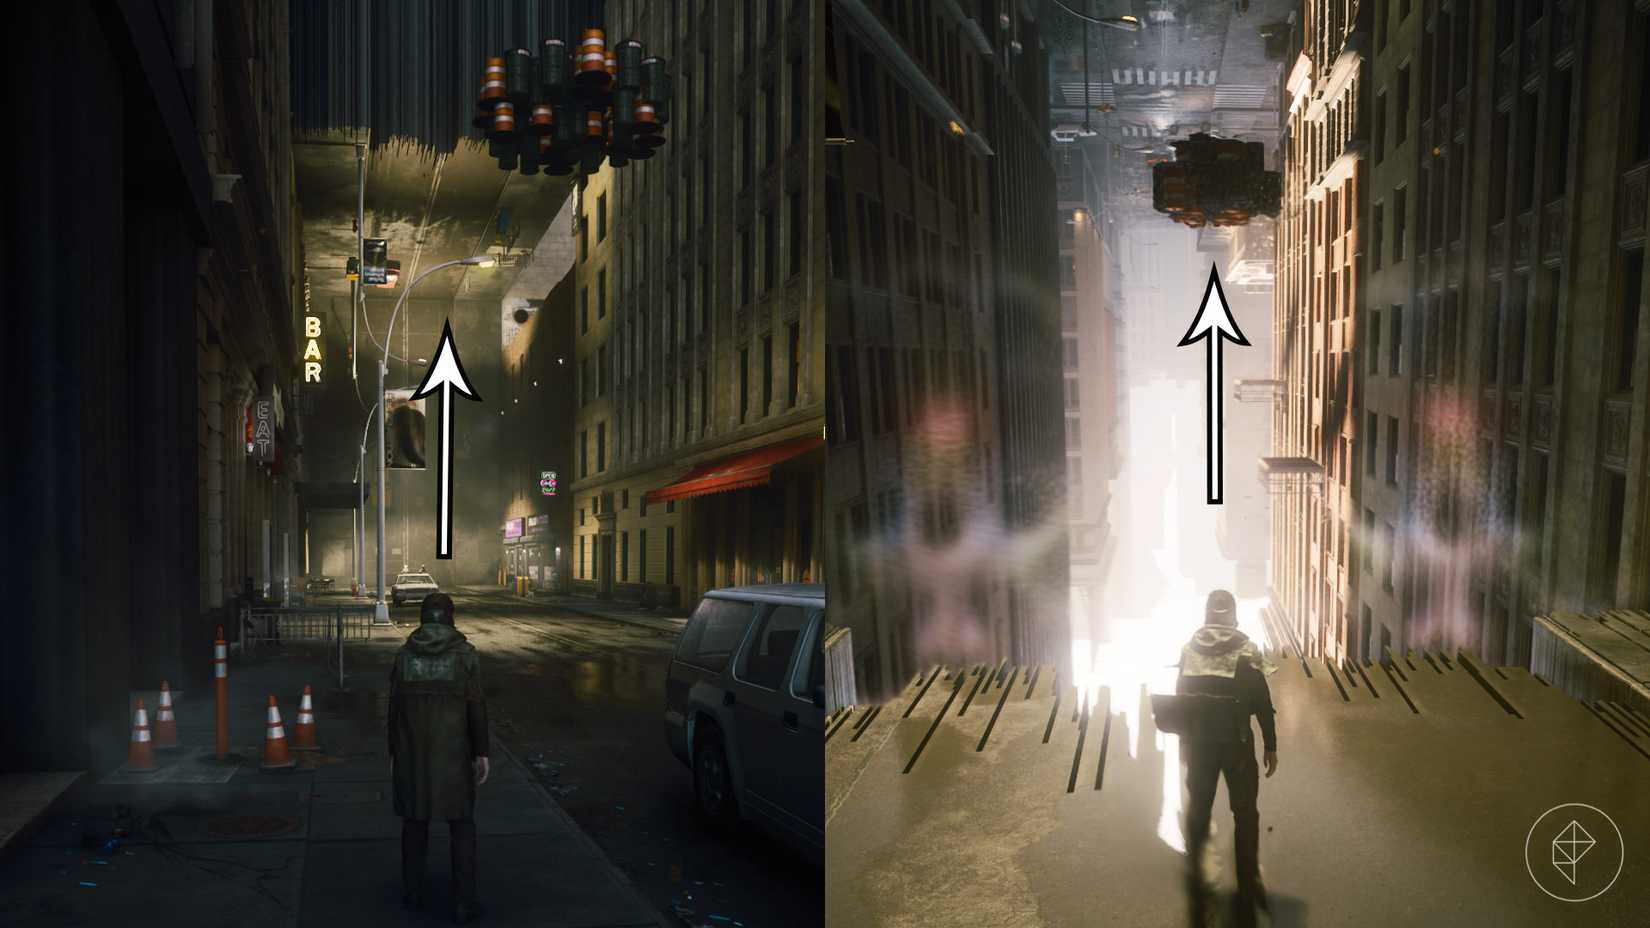
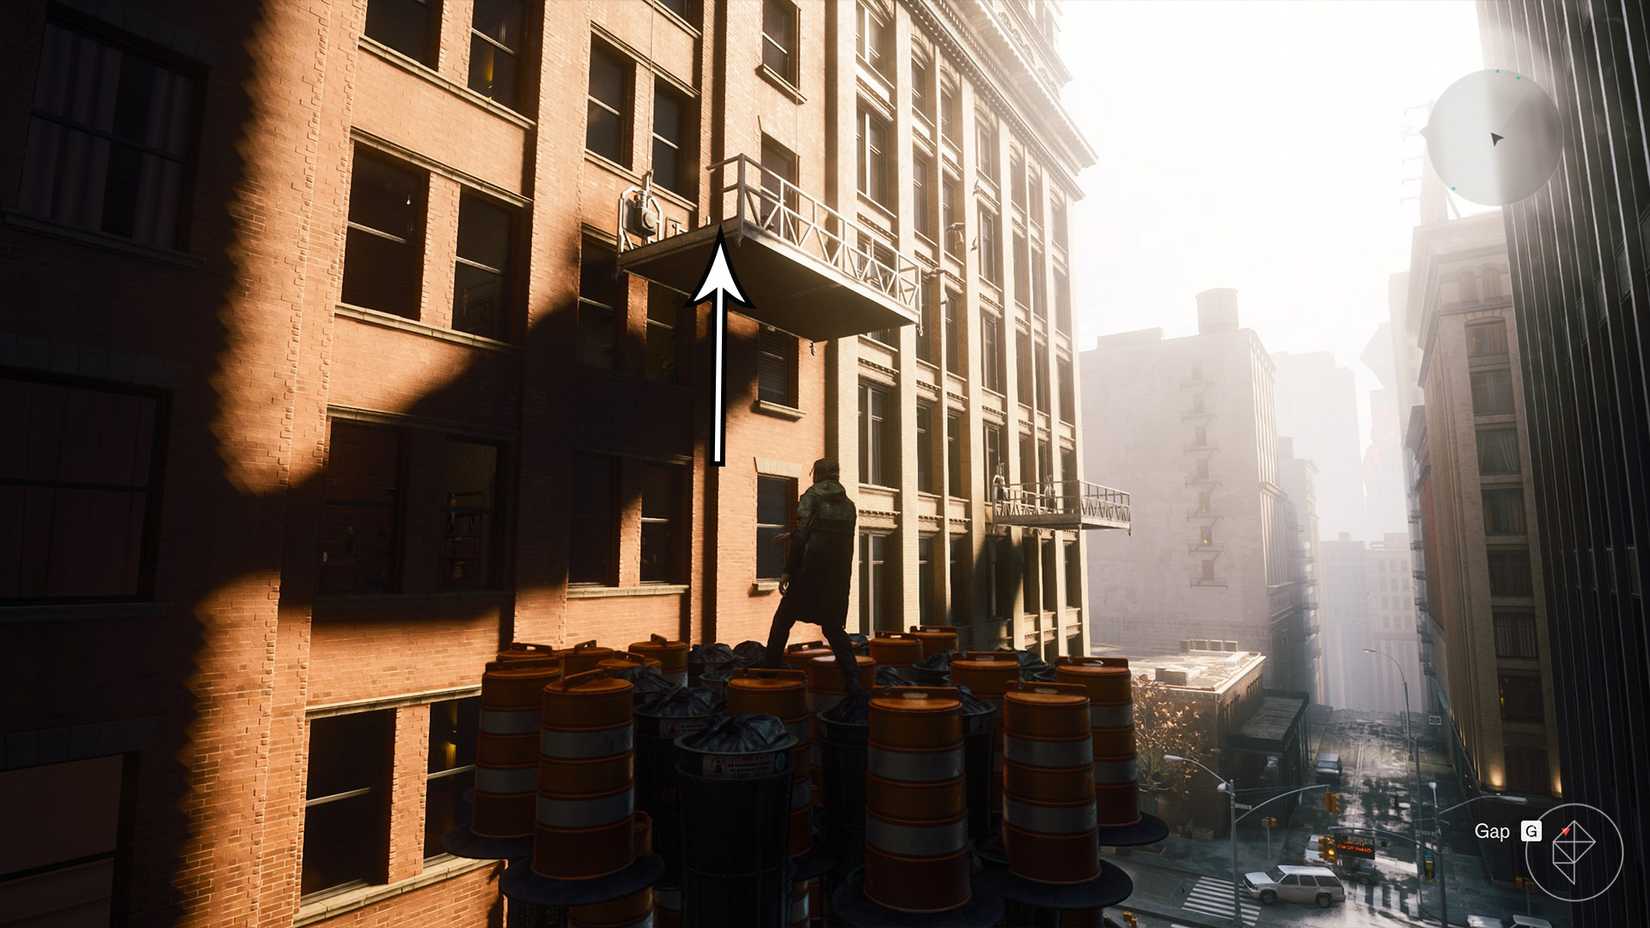
The second West Incursion Zone camera is affixed to a suspended scaffolding platform in the southeastern sector, positioned northwest of the Museum of Curiosities. Accessing this location requires walking westward down the street and employing Shift to reach the inverted ceiling road. From the edge of this surface, players can locate a floating platform composed of traffic cones and garbage cans. By running directly off the edge rather than jumping—a maneuver that prompts the screen’s perspective to invert—players can safely land on the floating platform chain and ultimately leap onto the elevated scaffolding to power down the camera.
Evacuation Zone ‘Freeze Frame’ Camera Locations
The Evacuation Zone houses two cameras, the first of which is located on the eastern side of the sector, southwest of the Main Street fast travel door and its corresponding map pylon. Deactivating this camera requires an intricate power core relay sequence. Beginning near the power cores south of the Evac Building, players must strike a core, sprint westward down the street, and transfer the electricity into an uncharged core positioned just before a sealed door. From there, players progress through the threshold, transfer the charge to another core further down the street, scale a metal platform leading to a nearby rooftop, and finally transfer the electrical current to a final rooftop core. This sequence unlocks the internal door, granting safe access to the camera.
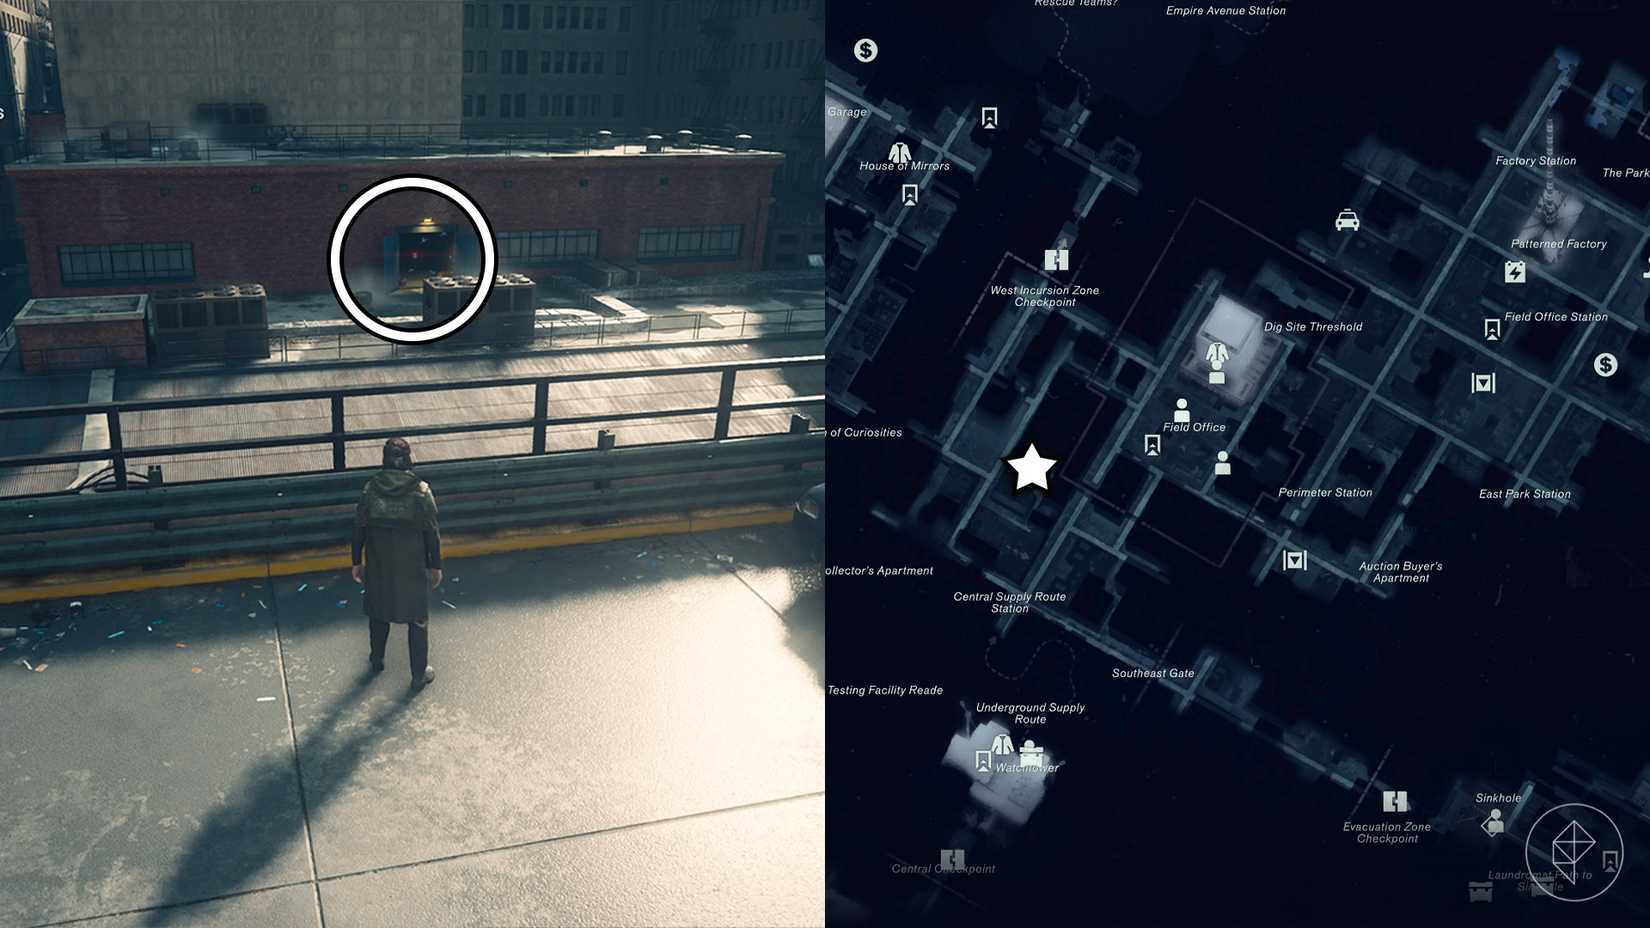
The second Evacuation Zone camera is situated on a building just south of the Railyard Street Station. Reaching this site necessitates the Reach ability, obtained from the Subway Fault housed within the station itself. By using Reach to scale the rooftop, players must once again intentionally allow the camera to capture them, causing it to temporarily vanish. Entering the building and exiting through the ground-floor front door prompts the camera to reappear, allowing players to retrace their path through the interior and approach the device from behind.
The Park ‘Freeze Frame’ Camera Locations
The Park features two hidden cameras, beginning with one positioned on a suspended scaffolding platform outside the southern sewer entrance. Players who have not yet explored this section must first traverse the northern sewer entrance and exit southward. Activating this camera requires powering a core located near an elevator below street level, utilizing a charged core found further south. Once the power is transferred and the elevator ridden to the top, players can glide across to the higher platform and drop down directly behind the target.
The second camera is housed within the Nomad Avenue Station in the southwestern region of The Park, situated near a mold-crusted chasm and a local movie theater. Descending the interior stairs reveals the camera to the right, while a mold-blocked door to the left bars the direct route. By employing either the Ignite or Inferno combat abilities—unlocked by defeating The Deserter resonant in Central—players can clear the white mold web, navigate the corridor, and emerge behind the device.
Underpass ‘Freeze Frame’ Camera Locations
The Underpass zone contains two cameras, with the first located near the entrance along the glowing path leading to The Spire. Players will spot a pillar illuminated by a bright yellow light alongside frozen enemies. By leaping to the initial pillar and using the Reach ability on a designated point beneath the camera, players can clear the path ahead, drop through a floor opening, and locate the camera at the end of the northwestern hallway.
The second camera is positioned on a pillar directly south of Tubes Island, the site of the Underpass Fault. Upon arriving at the island, players encounter an area dense with blue mold and hostile entities. The camera rests within an elevated opening too high for standard elevation abilities. By navigating around the right corner and using Reach to access a red-carpeted ceiling area, players can utilize Shift to walk along the wall toward a floor opening. Landing carefully on a patch of blue mold in the corner allows players to drop through a secondary lower opening, positioning them directly behind the camera.
Unknown Zone ‘Freeze Frame’ Camera Locations
The Unknown zone features two final cameras, beginning with one located on the upside-down portion of the central island. Approaching from the Oldest House requires utilizing Reach to access the overhead buildings before heading to the northern construction site. Descending the stairs from the second floor into the main room triggers an enemy ambush, after which players can locate the camera immediately to the left of a large mold growth near the eastern wall.
The second camera is situated inside a laundromat on Factory Island, the southwestern island of the Unknown zone. Players can access this area either by utilizing pylons deployed from Pope’s research balloon or via the Factory Island fast travel door. Rather than approaching the vertical street directly—which triggers the camera’s freezing effect—players must use Reach to access a building on the right side of the street, traverse the rooftops, drop into the rear area, and enter through an open garage door to reach the camera from behind.
Containing the Cameras in Downtown
Upon locating and deactivating all individual cameras throughout the regions, Zoe alerts the player that a final group of surveillance devices has begun malfunctioning outside the Oldest House. Upon arrival, players encounter a linear formation of seven active cameras. The objective requires shutting down every device in sequence; however, deactivating any single camera causes the remainder to instantly teleport to a new location. Furthermore, falling victim to a camera’s gaze results in a reset to the previous containment step, making precision and stealth paramount.
Approaching the initial lineup from the east prevents immediate detection from the west. After shutting down the first camera, the remaining devices relocate to a northern rooftop, accessible via an alleyway platform to the northeast. Successive teleports place the cameras onto a green building requiring Reach from an adjacent brick building, followed by a split formation where two cameras remain on a rooftop and two relocate to street level behind a northern door. Subsequent relocations place the devices atop a southwest concrete wall, a metal platform, and finally return the ultimate camera to its original central position. Successfully neutralizing this final anomaly completes the quest and rewards the player with the Shiny Pebble artifact recipe, granting a steady health regeneration effect of up to 50% while utilizing gravity anomalies.